Let us help you with the fundamentals of vinyl decal installation to make sure that each application is completed properly and your finished product looks its best! Learn how to correctly prepare surfaces and choose the right materials, as well as how to apply them with precision and accuracy.
Installing a vinyl decal is not as difficult as it may seem, even for those without any prior experience. Whether you’re looking to add some informational signage to your business entry doors or decorate a wall in your home office, there are a few basic steps that should be taken when installing any kind of sticker or decal. To get the most out of your vinyl decal installation, here are some tips and tricks that can help make the process easier and ensure long-lasting results.
 To get started, make sure you order the correct type of vinyl dependent upon your installation surface. If your wall is textured, be sure to order a thicker and more durable vinyl that is meant specifically for textured or uneven surfaces. If you’ll be mounting your decal to glass doors or windows, there are a few different options available such as adhesive or window cling. Additionally, if applying your graphic to the floor, you’ll want to make sure it’s safe to do so and the vinyl is made with slip-resistant properties, as well as durable enough to withstand the foot-traffic. Also consider the length of time you expect to need your decal in place. Some vinyl types are available in temporary, semi-permanent, or permanent applications, so be sure you’re ordering the correct durability rating based on your needs.
An important step to take before getting started with installation, is to prepare the surface where your decal will be applied. Make sure that it’s clean, dry, and free from anything that could hinder the adhesive quality of the decal. Using soap, detergent, or rubbing alcohol can help make sure that the surface is free of any oils, fingerprints, or residue which might prevent proper adhesion of your new vinyl decal. It’s also important to choose a location where you won’t have to worry about frequent exposure to water or heat, as this could cause premature wear on the design over time.
Next, take time to plan out where exactly each piece of your project should go before beginning installation. This way, any leveling, centering, and measurements will have been taken care of ahead of time so nothing goes wrong during application process. Again keep in mind the type of vinyl you’re installing, as some vinyl isn’t meant to be repositioned, while other types might be able to be moved around quite a bit before being permanently adhered. Once everything has been measured out accordingly then it’s time to begin actually putting the vinyl onto whatever surface you’ve chosen—be it your walls, windows, or vehicle.
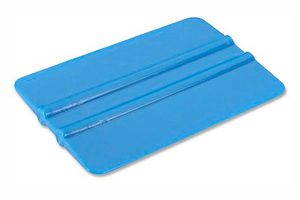 After cleaning and drying your surface and making sure your vinyl is in the position you prefer, it’s essential that you have the right tools. The most important tool for installation is a squeegee—a plastic or rubber instrument used to spread and smooth material over surfaces. It’s especially useful when applying adhesive materials such as vinyl decals, allowing you to press the material securely to your desired surface. Use your squeegee to apply pressure evenly across the decal for optimal results. To help ensure success when adhering vinyl decal, use the squeegee to smooth out bubbles and get rid of wrinkles before peeling off the transfer tape. Start in the center of the decal and work outward using even pressure. Use firm, consistent strokes to rub down any remaining air bubbles over top of transfer tape.
Alternatively, using a solution like application fluid or water to wet the vinyl and making the installation even easier! This allows you to easily reposition the decal when needed as it’s not yet completely adhered to the surface. Once in place, use your squeegee to ensure all the edges are firmly stuck down, making sure that any air bubbles get pushed out too. After this step, leave your vinyl alone until it is dry.
Once your decal is firmly adhered in your desired location, it’s time to remove the transfer tape and reveal your finished design! Fortunately, removing transfer tape is a simple process. Start by peeling away one corner of the transfer tape at an angle and very slowly until it’s off of the entire vinyl decal. If any parts of the decal remain stuck to the transfer paper, use your fingers or a pair of tweezers to help pull those pieces off and adhere them onto their intended surface.
In conclusion, the installation of a vinyl decal is a relatively easy process that can be done in a few simple steps. It is important to take your time when installing to ensure the decal has been placed correctly and securely. Taking the time to correctly install your vinyl decal will ensure it will last for many years, as it should not be moved or adjusted once placed. With this project completed, you now have a unique and stylish addition to any space.