Make sure your photo ID badges are picture-perfect.
Most people who are getting a new ID badge have one primary concern: the photo.
Whether it is an employee ID badge or a student ID card, the featured picture is the first thing that captures everyone’s attention. It should be a pretty easy task to take, right?
The subject should stand or sit in the designated spot and look at the camera while the photographer presses the button. Then you wait while it’s uploaded and cropped, and the photo is ready to be printed on an ID!
It’s not usually as simple as it sounds, though. After reviewing the photo ID, many subjects notice their eyes are red, their faces are pale, or something else looks off.
Wondering what you can do to get the perfect shot on the first try? Here are some tips!
Use proper lighting
Lighting is crucial for any good photo, and ID badge photos are no different. Most businesses will have overhead fluorescent lights that contribute to discolored or unflattering pictures.
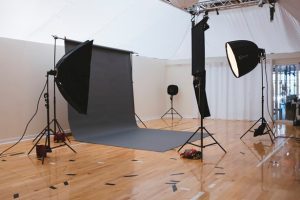
Natural lighting is always the best option when it is available since it’s flattering and won’t look artificial on camera. Of course, you can always invest in a lighting kit if you plan on taking lots of ID photos or your office space isn’t the most conducive to taking photos in natural light.
Pick a neutral background
The background should add to the photo, not cause a distraction. Typically, the person’s face is the main focus of the picture, so a plain or neutral background can help keep the subject at the center of attention. If you or your subject wants to add color, stick with soft blues or a subtle pattern instead of bright tones.
A neutral, consistent background is especially helpful if you’re aiming for a cohesive, professional look for your work name badges.
Create an angle
Want to know how to take a great ID photo? This tip is key. Any picture from straight on makes the photo look unnatural and awkward 一 not to mention it’s a generally unflattering angle. You want the subject to appear relaxed, so you should use a slight downward angle when snapping ID pictures if you can. This can help eliminate the risk of an employee or student not liking their photo and requesting a do-over!
Use a tripod
Even the steadiest hands could stand to benefit from using a tripod for photographs. Tripods can help create the most professional-looking badge picture, decreasing the chances of your image appearing blurry. Furthermore, a tripod can help you set up your subject and then make other adjustments to the shot, like the lighting. As a result, you’ll end up saving time while creating a high-quality photo.
Review the photo
Every photographer should review photos before dismissing the subject. If you don’t like a particular shot, chances are the person in the photo won’t either. Review your photos for any shadows, harsh lighting, blinking, red eyes, or other issues that contribute to a low-quality image. If any of these issues are present, adjust your settings and take another shot.
Lights, camera, action!
Learning how to take a great ID photo isn’t difficult! Now you know all of the tricks, and you’re ready to get back out there. It may take some practice and proper equipment, but the quality of the images will improve, and your subjects will be happier with their photo ID badges.
When you’ve taken your photos and are ready to create your photo ID badges, shop our extensive selection and start designing the best badges for your team!

